DB 이중화 feat Mysql
들어가면서
Replication이란, 2대 이상의 DBMS로 데이터를 나누는 구조, Master / Slave 구성으로 이루어진다. 참고자료
-
Master DBMS : 데이터 등록,수정,삭제 요청시 바이너리 로그를 생성하여, Slave 서버로 전달 (동시성 높은 트렌젝션 부분 담당)
-
Slave DBMS : Master DBMS에서 전달받은 바이너리 로그를 이용하여, 데이터로 반영(데이터 요청시 사용) (읽기 전용 데이터 조회)

활용 방법
- Master DBMS가 장애시, Slave DBMS를 대신 사용가능(fail over)
- DBMS 부화분산 목적, 사용자의 폭주로 인하여, 1대의 DB 서버가 감당할 수 없을때 사용
주의 사항
- 호환성을 위해 Replication을 사용하는 Mysql 버전 동일하게 맞추기
- 만약 버전이 다르면, Slave가 상위 버전으로 세팅
- Repliacation 시동시 Master -> Slave 순으로 가동
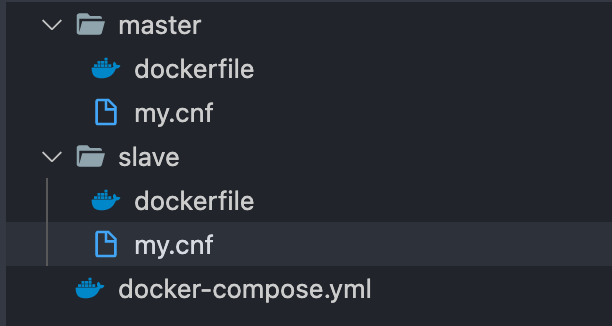
Docker를 활용한 Mysql Replication
참고자료 디렉토리 구성은 아래와 같다.
실행순서
- master-slave 두 서버 띄우기
docker-compose up -d - internal IP 찾기
- Network id를 먼저 찾는다.
❯ docker network ls
NETWORK ID     NAME                    DRIVER    SCOPE
c936b9b7cc42   repli_net-mysql         bridge    local
- Network id를 먼저 찾는다.
- docker inspect {NETWORK ID}에서 IPv4Address에 해당하는 값을 기억한다.
❯ docker inspect c936b9b7cc42

[
    {
        "Name": "repli_net-mysql",
        "Id": "c936b9b7cc4214b978aa64d7397d218c0fe62dd76389971ef2134ea8a8560765",
        "Created": "2022-01-11T14:36:21.9461848Z",
        "Scope": "local",
        "Driver": "bridge",
        "EnableIPv6": false,
        "IPAM": {
            "Driver": "default",
            "Options": null,
            "Config": [
                {
                    "Subnet": "172.19.0.0/16",
                    "Gateway": "172.19.0.1"
                }
            ]
        },
        "Internal": false,
        "Attachable": true,
        "Ingress": false,
        "ConfigFrom": {
            "Network": ""
        },
        "ConfigOnly": false,
        "Containers": {
            "31b2a62702a6249c666076d7182a34c30ac3e2939ea6924b84b237fb6a57e915": {
                "Name": "repli_db-slave_1",
                "EndpointID": "afbd9ee57c687c50fab1b39be1b97919229fff04fc418269612c058cbff06554",
                "MacAddress": "02:42:ac:13:00:03",
                "IPv4Address": "172.19.0.3/16",
                "IPv6Address": ""
            },
            "43bb2e42864eaa10c730ae53c01ab9817a49c5c34db2eba62ce3e14f92779cdb": {
                "Name": "repli_db-master_1",
                "EndpointID": "6e2d8cc63e3fc5d6322ab2de3d6bf414ee49a885ded7e26d66b4afb9188e6090",
                "MacAddress": "02:42:ac:13:00:02",
                "IPv4Address": "172.19.0.2/16",
                "IPv6Address": ""
            }
        },
        "Options": {},
        "Labels": {
            "com.docker.compose.network": "net-mysql",
            "com.docker.compose.project": "repli",
            "com.docker.compose.version": "1.29.0"
        }
    }
]
- Slave에서 Master로 연결한다.
사실 이 부분에서 삽질을 조금했었다. 내가 마주했었던 오류는, “Error 1236 - “Could not find first log file name in binary log index file” 이었는데, slave 서버에서 MASTER_LOG_FILE을 세팅할 때, master 서버에 존재하는 log file을 기준으로 세팅을 해야한다.
이를 위해서 master 서버에서 아래 문구를 치면 이렇게 나온다.
mysql> SHOW BINARY LOGS;
+------------------+-----------+
| Log_name         | File_size |
+------------------+-----------+
| mysql-bin.000001 |       177 |
| mysql-bin.000002 |   3072319 |
| mysql-bin.000003 |       177 |
| mysql-bin.000004 |       154 |
+------------------+-----------+
이중에 없는 로그 파일 인덱스를 선택하면 에러가 난다. 그 후 아래와 같이 세팅을 맞춰줬다. 결론적으로, Slave_IO_Running: Yes / Slave_SQL_Running: Yes 으로 표시되면 동기화가 완료된 것이다.
mysql> CHANGE MASTER TO MASTER_HOST='172.19.0.3', MASTER_USER='root', MASTER_PASSWORD='password', MASTER_LOG_FILE='mysql-bin.000003',MASTER_LOG_POS=0;
Query OK, 0 rows affected, 2 warnings (0.00 sec)

mysql> stop slave;
Query OK, 0 rows affected (0.00 sec)

mysql> start slave;
Query OK, 0 rows affected (0.00 sec)

mysql> show slave status\G;
*************************** 1. row ***************************
               Slave_IO_State: Waiting for master to send event
                  Master_Host: 172.19.0.3
                  Master_User: root
                  Master_Port: 3306
                Connect_Retry: 60
              Master_Log_File: mysql-bin.000004
          Read_Master_Log_Pos: 154
               Relay_Log_File: mysql-relay-bin.000004
                Relay_Log_Pos: 367
        Relay_Master_Log_File: mysql-bin.000004
             Slave_IO_Running: Yes
            Slave_SQL_Running: Yes
              Replicate_Do_DB:
          Replicate_Ignore_DB:
           Replicate_Do_Table:
       Replicate_Ignore_Table:
      Replicate_Wild_Do_Table:
  Replicate_Wild_Ignore_Table:
                   Last_Errno: 0
                   Last_Error:
                 Skip_Counter: 0
          Exec_Master_Log_Pos: 154
              Relay_Log_Space: 787
              Until_Condition: None
               Until_Log_File:
                Until_Log_Pos: 0
           Master_SSL_Allowed: No
           Master_SSL_CA_File:
           Master_SSL_CA_Path:
              Master_SSL_Cert:
            Master_SSL_Cipher:
               Master_SSL_Key:
        Seconds_Behind_Master: 0
Master_SSL_Verify_Server_Cert: No
                Last_IO_Errno: 0
                Last_IO_Error:
               Last_SQL_Errno: 0
               Last_SQL_Error:
  Replicate_Ignore_Server_Ids:
             Master_Server_Id: 10
                  Master_UUID: fd513db6-72eb-11ec-890b-0242ac130002
             Master_Info_File: /var/lib/mysql/master.info
                    SQL_Delay: 0
          SQL_Remaining_Delay: NULL
      Slave_SQL_Running_State: Slave has read all relay log; waiting for more updates
           Master_Retry_Count: 86400
                  Master_Bind:
      Last_IO_Error_Timestamp:
     Last_SQL_Error_Timestamp:
               Master_SSL_Crl:
           Master_SSL_Crlpath:
           Retrieved_Gtid_Set:
            Executed_Gtid_Set:
                Auto_Position: 0
         Replicate_Rewrite_DB:
                 Channel_Name:
           Master_TLS_Version:
1 row in set (0.00 sec)
테스트
결론적으로 테스트를 해보기 위해서, DB와 테이블 데이터를 직접 넣어보았다.
Master DB
mysql> use bootex;
Database changed

mysql> create table Member (ID int not null primary key, name varchar(100));
Query OK, 0 rows affected (0.01 sec)

mysql> insert into Member(id, name)  values (1,"song")
    -> ;
Query OK, 1 row affected (0.01 sec)
Slave DB
mysql> show tables;
+------------------+
| Tables_in_bootex |
+------------------+
| Member           |
+------------------+
1 row in set (0.00 sec)

mysql> select * from Member;
+----+------+
| ID | name |
+----+------+
|  1 | song |
+----+------+
1 row in set (0.00 sec)